Fun with Shapefiles, CRSs and GeoTools

Although I’m now in the “GIS business” for years I had never to deal with shapefiles directly. Now it was time also to investigate tools like QGIS and hack together a simple reader for shp files. At least I thought it was simple but calling me a GIS expert afterwards would be a ridiculous understatement.

GeoTools fun

A quick look and I decided to go with GeoTools as I knew it from name and I needed a tool in Java. Thanks to QGIS I understood quickly that in my case I had to deal with a list of a list of lines containing coordinates but how to read that via GeoTools? The internet provided several solutions, but I didn’t found complete examples for my case. As it turned out: I had to explicitly cast 2 times (!) first from “Feature” to “SimpleFeature” and then from “Geometry” to “MultiLineString”. Not sure if this is really necessary. At least this makes learning a new API very hard.

Now I had the initial code:

Map connect = new HashMap();
// a File is not sufficient as a shapefile consists of multiple files
connect.put("url", file.toURI().toURL());
DataStore dataStore = DataStoreFinder.getDataStore(connect);
String[] typeNames = dataStore.getTypeNames();
String typeName = typeNames[0];
FeatureSource featureSource = dataStore.getFeatureSource(typeName);
CoordinateReferenceSystem sourceCRS = featureSource.getSchema().getCoordinateReferenceSystem();
FeatureCollection collection = featureSource.getFeatures();
// allow for some error due to different datums ('bursa wolf parameters required')
boolean lenient = true;
MathTransform transform = CRS.findMathTransform(sourceCRS, targetCRS, lenient);

List<List<GPXEntry>> lineList = new ArrayList<>();
try (FeatureIterator iterator = collection.features()) {
    while (iterator.hasNext()) {
        SimpleFeature feature = (SimpleFeature) iterator.next();
        MultiLineString mlString = (MultiLineString) feature.getDefaultGeometry();
        ...
    }
}

How short and beautiful. But: It did not compile. And that although I was using the recommended “maven procedure”. It seems that GeoTools seems to follow a bit unusual path that it requires you to define the repositories in your pom.xml – I did only find a solution with the snapshot versions but this was sufficient for the time being.

CRS fun

At least it seemed to work then. But after further longish time I found out that the coordinates had just a tiny offset, so something was wrong with the source or target coordinate reference system (CRS) or with the transformation itself. Again QGIS helped me here and determined the source CRS correctly. But GeoTools was somehow wrong and initially I thought it was GeoTools fault.

But I quickly stumbled over another CRS issue and had to deal with exactly the same CRSs leading to different results. In my case it was CRS.decode(“EPSG:4326”) vs. DefaultGeographicCRS.WGS84 – so they are identical but the results were different!? It turns out that the coordinate axes are mixed! GeoTools fault? No! GeoTools even gave me the solution in its documentation:
“So if you see some data in “EPSG:4326” you have no idea if it is in x/y order or in y/x order”!

Deployment

Puh. Okay. I was ready for deployment and used my usual git and mvn assembly procedure to push stuff on my server but then I got exceptions while runtime about missing classes! Oh no – how can this be when I use maven?
As it turns out GeoTools requires the maven shade plugin in order to bundle the database for correct CRS transformation properly via a plugin architecture I think. And look: the whole jar is now nearly 12MB!

Conclusion

The GIS and Java world are called “enterprise” for a reason. I hope I can help others with my findings. Find the fully working code here.

Rage Against the Android – Nearly solved! #eclipse #netbeans

After ranting against Android in my previous post I have mainly solved now the untestable situation Android is producing.

Thanks to Robolectric all my tests are finally fast and do not unpredictable hang or similar!

The tests execute nearly as fast as in a normal Maven project – plus additional 2 seconds to bootstrap (dex?). Robolectric was initially made for maven integration on IntelliJ. But it works without Maven and under Eclipse as described here. I didn’t get robolectric working via Maven under Eclipse – and it was overly complex e.g. you’ll need an android maven bridge but when you use a normal Android project and a separate Java projects for the tests then it works surprisingly well for Eclipse.

Things you should keep in mind for Eclipse:

  • Eclipse and Robolectric description here
  • In both projects put local.properties with sdk.dir=/path/to/android-sdk
  • Android dependencies should come last for the test project as well as in the pom.xml for the maven integration (see below)

But now even better: when you are doing your setup via Maven you can use NetBeans! Without any plugin – so even in the latest NetBeans version. But how is the setup done for Maven? Read this! After this you only need to open the project with NetBeans (or IntelliJ).

Things you should keep in mind for Maven and NetBeans:

  • Use Maven >= 3.0.3
  • Again: put the android dependencies last!
  • Specify the sdk path via bashrc, pom.xml or put it into your settings.xml ! Sometimes this was not sufficient in NetBeans – then I used ANDROID_HOME=xy in my actions
  • Make sure “compile on save” is disabled for tests too, as I got sometimes strange exceptions
  • deployment to device can be done to:
    mvn -DskipTests=true clean install      # produce apk in target or use -Dandroid.file=myApp.apk in the next step
    mvn -Dandroid.device=usb android:deploy # use it
    mvn android:run
  • If you don’t have a the Android plugin for NetBeans just use ‘adb logcat | grep something’ for your UI to the logs

Thats it. Back to hacking and Android TDD!

Db4o via Maven

I couldn’t find the correct maven deps for db4o if you use transparent activation … so here you are:

<dependencies>
 <dependency>
    <groupId>com.db4o</groupId>
    <artifactId>db4o-full-java5</artifactId>
    <version>${db4o.version}</version>
 </dependency>

 <dependency>
    <groupId>com.db4o</groupId>
    <artifactId>db4o-tools-java5</artifactId>
    <version>${db4o.version}</version>
    <scope>compile</scope>
 </dependency>

 <dependency>
    <groupId>com.db4o</groupId>
    <artifactId>db4o-taj-java5</artifactId>
    <version>${db4o.version}</version>
    <scope>compile</scope>
 </dependency>

 <dependency>
    <groupId>com.db4o</groupId>
    <artifactId>db4o-instrumentation-java5</artifactId>
    <version>${db4o.version}</version>
    <scope>compile</scope>
 </dependency>

 </dependencies>

 <repositories>
    <repository>
      <id>db4o</id>
      <name>Db4o</name>
      <url>https://source.db4o.com/maven/</url>
    </repository>
 </repositories>

To use TA while build time you need the following snippet in your pom.xml:

<plugin>
    <artifactId>maven-antrun-plugin</artifactId>
    <version>1.3</version>
    <dependencies>
        <!-- for the regexp -->
        <dependency>
            <groupId>org.apache.ant</groupId>
            <artifactId>ant-nodeps</artifactId>
            <version>1.7.1</version>
        </dependency>

        <dependency>
            <groupId>org.slf4j</groupId>
            <artifactId>slf4j-log4j12</artifactId>
            <version>${slf4j.version}</version>
        </dependency>
    </dependencies>
    <executions>
        <execution>
            <phase>compile</phase>
            <configuration>
                <tasks>
                    <!-- Setup the path -->
                    <!-- use maven.compile.classpath instead db4o.enhance.path -->

                    <!-- Define enhancement tasks -->
                    <typedef resource="instrumentation-def.properties"
                             classpathref="maven.compile.classpath"
                             loaderref="db4o.enhance.loader" />

                    <!-- Enhance classes which include the @Db4oPersistent annotation -->
                    <!--
                    <typedef name="annotation-filter"
                             classname="tacustom.AnnotationClassFilter"
                             classpathref="maven.compile.classpath"
                             loaderref="db4o.enhance.loader" /> -->

                    <typedef name="native-query"
                             classname="com.db4o.nativequery.main.NQAntClassEditFactory"
                             classpathref="maven.compile.classpath"
                             loaderref="db4o.enhance.loader" />

                    <!-- Instrumentation -->
                    <db4o-instrument classTargetDir="target/classes">
                        <classpath refid="maven.compile.classpath" />
                        <sources dir="target/classes">
                            <include name="**/*.class" />
                        </sources>

                        <!-- <jars refid="runtime.fileset"/> -->

                        <!-- Optimise Native Queries -->
                        <native-query-step />

                        <transparent-activation-step>
                            <!-- <annotation-filter /> -->
                            <regexp pattern="^de\.timefinder\.data" />
                            <!-- <regexp pattern="^enhancement\.model\." /> -->
                        </transparent-activation-step>
                    </db4o-instrument>
                </tasks>
            </configuration>
            <goals>
                <goal>run</goal>
            </goals>
        </execution>
    </executions>
</plugin>

And you will need to configure db4o ala

config.add(new TransparentActivationSupport());

// configure db4o to use instrumenting classloader
config.reflectWith(new JdkReflector(Db4oHelper.class.getClassLoader()));
config.diagnostic().addListener(new DiagnosticListener() {

   @Override
   public void onDiagnostic(Diagnostic dgnstc) {
      System.out.println(dgnstc.toString());
   }
});

Thanks to ptrthomas! … without his nice explanation I woudn’t got it working.

<plugin>
<artifactId>maven-antrun-plugin</artifactId>
<version>1.3</version>
<dependencies>
<!– for the regexp –>
<dependency>
<groupId>org.apache.ant</groupId>
<artifactId>ant-nodeps</artifactId>
<version>1.7.1</version>
</dependency>
</dependencies>
<executions>
<execution>
<phase>compile</phase>
<configuration>
<tasks>
<!– http://ptrthomas.wordpress.com/2009/03/08/why-you-should-use-the-maven-ant-tasks-instead-of-maven-or-ivy/ –>
<!–<echo>NOW</echo>–>

<!– TODO get jar –>
<!–
<typedef resource=”org/apache/maven/artifact/ant/antlib.xml” uri=”urn:maven-artifact-ant”
classpath=”lib/maven-ant-tasks.jar”/>

<condition property=”maven.repo.local” value=”${maven.repo.local}” else=”${user.home}/.m2/repository”>
<isset property=”maven.repo.local”/>
</condition>

<artifact:localRepository id=”local.repository” path=”${maven.repo.local}”/>

<artifact:pom file=”pom.xml” id=”maven.project”/>

<artifact:dependencies pathId=”compile.classpath” filesetId=”compile.fileset” useScope=”compile”>
<pom refid=”maven.project”/>
<localRepository refid=”local.repository”/>
</artifact:dependencies>

<artifact:dependencies pathId=”runtime.classpath” filesetId=”runtime.fileset” useScope=”runtime”>
<pom refid=”maven.project”/>
<localRepository refid=”local.repository”/>
</artifact:dependencies>
–>
<!– Setup the path –>
<!– use maven.compile.classpath instead db4o.enhance.path –>

<!– Define enhancement tasks –>
<typedef resource=”instrumentation-def.properties”
classpathref=”maven.compile.classpath”
loaderref=”db4o.enhance.loader” />

<!– Enhance classes which include the @Db4oPersistent annotation –>
<!–
<typedef name=”annotation-filter”
classname=”tacustom.AnnotationClassFilter”
classpathref=”maven.compile.classpath”
loaderref=”db4o.enhance.loader” /> –>

<typedef name=”native-query”
classname=”com.db4o.nativequery.main.NQAntClassEditFactory”
classpathref=”maven.compile.classpath”
loaderref=”db4o.enhance.loader” />

<!– Instrumentation –>
<db4o-instrument classTargetDir=”target/classes” jarTargetDir=”target/”>
<classpath refid=”maven.compile.classpath” />
<sources dir=”src/main/java”>
<include name=”**/*.class” />
</sources>

<!–
TODO runtime.fileset
–>

<!– <jars refid=”runtime.fileset”/> –>

<!– Optimise Native Queries –>
<native-query-step />

<transparent-activation-step>
<!– <annotation-filter /> –>
<regexp pattern=”^de\.timefinder\.jetwick\.data” />
<!– <regexp pattern=”^enhancement\.model\.” /> –>
</transparent-activation-step>
</db4o-instrument>
</tasks>
</configuration>
<goals>
<goal>run</goal>
</goals>
</execution>
</executions>
</plugin>   </plugin>

Profile J2SE Maven Projects With Yourkit Profiler Under NetBeans 6.7

For my open source timetabler TimeFinder I got a free license of the Java profiler from yourkit.

TimeFinder is a maven project so it starts not out of the box with the latest yk-NetBeans plugin.

But the solution is simple:

  1. Right click the project->Set Configuration->Customize->Add… then enter a name (profile-algo) for the new configuration
  2. Go to the Run entry in this Project Properties dialog and select the Main Class where your mavenized J2SE application should start with
    nb-config-run
  3. Under VM Options I entered (for linux)
    -agentpath:/home/user/Programme/yourkit-profiler/bin/linux-x86-32/libyjpagent.so
    for another OS please look here.
  4. Then select the previously created configuration (profile-algo) in the tool bar under the menu bar and hit F6 to start the mavenized J2SE application
    nb-config
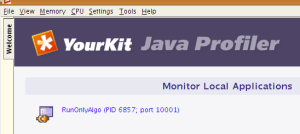
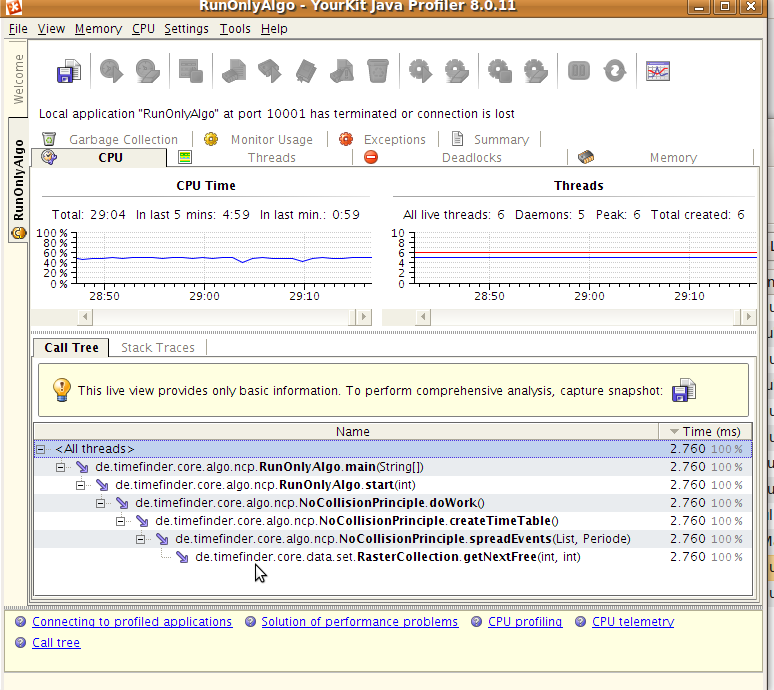
  5. At any time start the yk-profiler (before the J2SE application starts). Now a new entry under Monitor Local Applications should be listed. Click on that and you will be able to “look into” (aka “profile”) a mavenized J2SE application.
    yourkit-overview
    yk-profiler-at-runtime
  6. If you installed the NetBeans 6.7 plugin before you are even able to click on a source file in yk-profiler and this file will be opened automagically in NetBeans

hibernate.cfg.xml settings for derby, oracle and h2

GraphHopper – A Java routing engine

karussell ads

It took me some time to collect the hibernate.cfg.xml data which is necessary for derby, oracle and h2. So here are the default settings for those databases:

  1. Apache Derby (network)
    You start the network server and specify the following options in the script:Linux: DERBY_OPTS=”-Dij.driver=org.apache.derby.jdbc.ClientDriver -Dij.protocol=jdbc:derby://localhost:1527/ -Dij.user=admin -Dij.password=admin”
    Windows: set DERBY_OPTS=”-Dij.driver=org.apache.derby.jdbc.ClientDriver -Dij.protocol=jdbc:derby://localhost:1527/ -Dij.user=admin -Dij.password=admin”

    <property name=”hibernate.connection.driver_class”>org.apache.derby.jdbc.ClientDriver</property>
    <property name=”hibernate.connection.url”>jdbc:derby://localhost:1527/databaseName;create=true</property>
    <property name=”hibernate.connection.username”>admin</property>
    <property name=”hibernate.connection.password”>admin</property>
    <!– no schema necessary –>
    <property name=”hibernate.dialect”>org.hibernate.dialect.DerbyDialect</property>

  2. Oracle (thin)
    <property name=”hibernate.connection.driver_class”>oracle.jdbc.driver.OracleDriver</property>
    <property name=”hibernate.connection.url”>jdbc:oracle:thin:@host:1521:databaseName</property>
    <property name=”hibernate.connection.username”>YOURSCHEMA</property>
    <property name=”hibernate.connection.password”>YOURPASSWORD</property>
    <property name=”hibernate.default_schema”>YOURSCHEMA</property>
    <property name=”hibernate.dialect”>org.hibernate.dialect.OracleDialect</property>
  3. H2
    <property name=”hibernate.connection.driver_class”>org.h2.Driver</property>
    <property name=”hibernate.connection.url”>jdbc:h2:path\databaseName</property>
    <property name=”hibernate.connection.username”>sa</property>
    <property name=”hibernate.connection.password”></property>
    <property name=”hibernate.default_schema”>PUBLIC</property>
    <property name=”hibernate.dialect”>org.hibernate.dialect.H2Dialect</property>

To make it complete here are the maven settings for the databases:

  1. Apache Derby (network)
    <dependency>
    <groupId>org.apache.derby</groupId>
    <artifactId>derbyclient</artifactId>
    <version>10.4.2.0</version>
    </dependency>
  2. Oracle (thin) no public version is available but you could install the jar file into your local repository or into an archiva repository via:
    mvn install:install-file -DgroupId=com.oracle -DartifactId=ojdbc6 -Dversion=11.1.0.7.0 -Dpackaging=jar -Dfile=/path/to/file<dependency>
    <groupId>com.oracle</groupId>
    <artifactId>ojdbc6</artifactId>
    <version>11.1.0.7.0</version>
    </dependency>
  3. H2
    <dependency>
    <groupId>com.h2database</groupId>
    <artifactId>h2</artifactId>
    <version>1.1.102</version>
    </dependency>

Code Quality Tools in Java

There are several tools to measure the code quality of my free timetabling software TimeFinder. Here are the tools I tried with success:

  • FindBugs (latest version 1.3.8) – uses static analysis to look for bugs in Java code. This is a great tool, it discovered possible NullPointerExceptions and a lot more bugs in my projects. Sometimes I asked myself how this program could have discovered this ‘complicated’ bug.With the maven plugin you can do:
    mvn findbugs:findbugs

    which will use version 1.3.8 out of the box

  • PMD (latest version 4.2.5) – scans Java source code and looks for potential problems. The rules are configurable, but at the beginning you will only need the provided one (and spend a lot of time to choose your favourites ;-))In NetBeans 6.5 this tool is well integrated and works like a charme (CTRL+ALT+P).With the maven plugin you can do:
    mvn pmd:pmd

    after you specified the following in the pom.xml under<reporting> <plugins> :

    <plugin>
      <groupId>org.apache.maven.plugins</groupId>
      <artifactId>maven-pmd-plugin</artifactId>
      <version>2.3</version>
      <configuration>
        <targetJdk>1.5</targetJdk>
      </configuration>
     </plugin>

Other tools could be

  • JarAnalyzerIs a dependency management utility for jar files. It’s primary purpose is to traverse through a directory, parse each of the jar files in that directory, and identify the dependencies between the jar files.
  • HammurAPIa code quality governance platform

but I didn’t tried them so far.

For Findbugs  and pmd there is a NetBeans plugin (SQE … software quality environment) which looks promising, but fails with a NullPointerException after I installed it via the update center and tried it on my project. Maybe I should use one of the snapshots. (BTW: I successfully used the pmd-plugin and findbugs in the standalone version).

Sonar is another interesting approach to use several code quality tools at a time. With Sonar it is possible to see the violations or possible bugs over das or weeks  – so, you are looking at the improvements and you will not get lost in the mass of bugs at the beginning. Another “multi-tooling” project is XRadar.

A little bit offtopic, but a great tool is proguard, which shrinks, optimizes, obfuscates and preverifies Java class files. There is even a maven plugin for that.

Further with Maven and WebStart (jnlp)

If you want no server side setup for webstart all your clients must have a java version greater than java6 update 10 (the naming convention gets too complicated now, mr. sun! …)

For ubuntu 8.04 see my last blog entry how to install this java version.

All you need to do in our maven set-up of this post is to add the following 2 lines to our pom.xml:

</sign>
<pack200>true</pack200>
<gzip>true</gzip>

<verbose>true</verbose>

Then do:
mvn clean install webstart:jnlp
again and add one line

<j2se version=”1.6+” initial-heap-size=”32m” max-heap-size=”128m”/>
<property name=”jnlp.packEnabled” value=”true”/>

to our jnlp template.

And as it is described here you could even use the versioning feature
<property name=”jnlp.versionEnabled” value=”true”/>
with a specific naming convention, too:
foo__V1.0.jar

But all only if the clients have java > java6 update 10 …

Start TimeFinder here to try a servlet-free-packed200 application out. With jars it was approx 9 MB. Now all pack.gz files in sum are 3.3 MB! And the download time was approx 160 seconds, where now I downloaded und unpacked it within 40 seconds with the same internet connection. You can try it for yourself via switching the java version e.g. from java6_10 to 6_7 or to java5 (in ubuntu this is relative easy with ‘sudo update-alternatives –config javaws’) But before you have to remove the application from cache: start javaws -viewer, search TimeFinder’s shamrock and remove it. Otherwise TimeFinder would start nearly instantaneous.

Maven and WebStart (jnlp)

If you plan to deploy your maven application via webstart you are a lucky man, because this is easy if you know how to do it 😉

I tried it without success, but then Geoffrey with his networktools came to my rescue. Now TimeFinder is jnlp-enabled. The following steps were necessary:

  1. create a new folder ‘jnlp’ under src/ (where main and test live)
  2. put the file template.vm there with:
    <?xml version="1.0" encoding="utf-8"?>
    <jnlp spec="1.0+" codebase="http://timefinder.sourceforge.net/jnlp2" href="$outputFile">
     <information>
        <title>TimeFinder</title>
        <vendor>TimeFinder Team</vendor>
        <homepage href="http://timefinder.sourceforge.net/"/>
        <description kind="one-line">TimeFinder</description>
        <description kind="short">TimeFinder - the automatic timetabling generator for universities and schools</description>
        <description kind="tooltip">TimeFinder - the automatic timetabling generator for universities and schools</description>
        <icon href="http://timefinder.sourceforge.net/jnlp/shamrockwhite.jpg" kind="default"/>
        <shortcut online="false"><desktop/><menu submenu="TimeFiner"/></shortcut>
     </information>
     <security>
     <all-permissions/>
     </security>
     <resources>
        <j2se version="1.6+" initial-heap-size="32m" max-heap-size="128m" />
        <property name="jnlp.versionEnabled" value="true"/>
        $dependencies
     </resources>
     <application-desc main-class="$mainClass">
     </application-desc>
    </jnlp>
  3. create a keystore:
    keytool -genkey -alias timefinder -keystore timefinder.jks
    be sure that you use keytool from the same JDK-PATH as you use for maven!
  4. add the following to your pom.xml:
    <build>
      <plugins>
        <plugin>
           <groupId>org.codehaus.mojo</groupId>
           <artifactId>webstart-maven-plugin</artifactId>
           <version>1.0-alpha-1</version>
       </plugin>
     </plugins>
     <pluginManagement>
        <plugins>
           <plugin>
              <groupId>org.codehaus.mojo</groupId>
              <artifactId>webstart-maven-plugin</artifactId>
             <!-- do not bind to install phase
              <executions>
               <execution>
                 <goals>
                   <goal>report</goal>
                 </goals>
               </execution>
              </executions>
              -->
            <configuration>
               <jnlp>
                <mainClass>de.timefinder.core.Startup</mainClass>
               </jnlp>
              <sign>
               <keystore>/home/peterk/Dokumente/quell/timefinder/trunk/timefinder-core/timefinder.jks</keystore>
               <keypass>unsecpwd</keypass>
               <storepass>unsecpwd</storepass>
               <storetype>jks</storetype>
               <alias>timefinder</alias>
               <verify>true</verify>
             </sign>
            <verbose>true</verbose>
          </configuration>
         </plugin>
       </plugins>
      </pluginManagement>
     </build>
    </project>
  5. Now you should be able to execute:
    mvn install webstart:jnlp
    which will create a zip file with all the signed jars
  6. See my next post for versioning and pack200!